
Microsoft Features: Microsoft Purview Information Protection
Estimated Read Time: 5 minutes
In my previous blog, I provided an overview of the features of Purview Sensitivity Labels that help protect organizational data: encryption and visual markings. In case you missed it, here is the blog I’m referring to: How Purview Sensitivity Labels Help Protect Your Data.
In this blog, I’ll be diving into the step-by-step process to follow in order to configure encryption and visual markings for your sensitivity labels. I will not be including label configuration steps that fall outside of the intended focus. If you are interested in learning more about the configuration and publishing process of sensitivity labels from start to finish, feel free to refer to Microsoft Learn’s Create and configure sensitivity labels and their policies publication.
Configuring User-Defined Permissions
The steps below describe how to configure a sensitivity label that allows users to specify access controls at the time of label application (i.e., user defined permissions):
1. Navigate to Information Protection > Sensitivity labels in the Purview portal (https://purview.microsoft.com/informationprotection/informationprotectionlabels/sensitivitylabels).
2. Click on + Create a label.
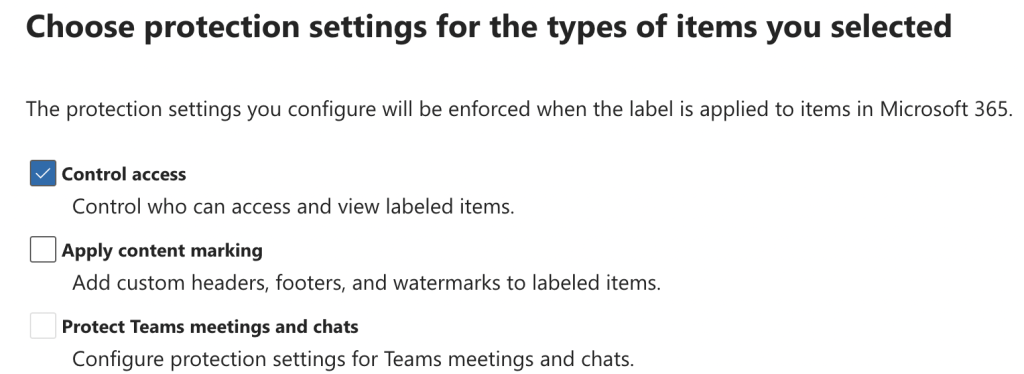
3. On the Choose protection settings for the types of items you selected page, ensure to select Control access.
4. On the Access control page, configure the following:
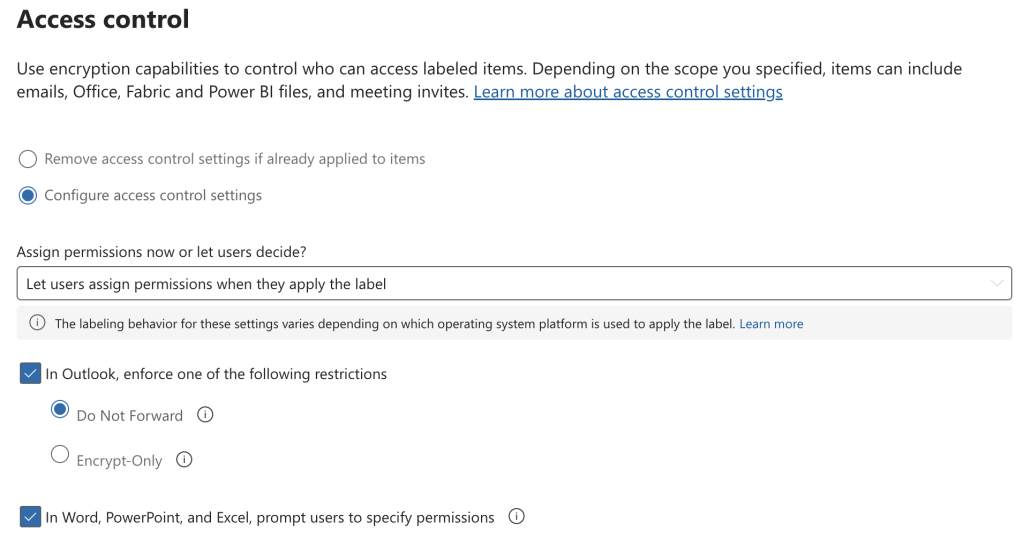
- Under Assign permissions now or let users decide?, select Let users assign permissions when they apply the label.
- If you would like to apply a Rights Management Template to emails in Outlook when this sensitivity label is applied, select the checkbox beside In Outlook, enforce one of the following restrictions. Depending on the desired behaviour, select either Do Not Forward (prevents recipients from forwarding, printing, or copying the content) or Encrypt-Only (ensures recipients must be authenticated to view the content).
- If you would like to prompt users in Office applications to specify permissions upon applying this sensitivity label to content, select the checkbox beside In Word, PowerPoint, and Excel, prompt users to specify permissions.
Configuring Admin-Defined Permissions
The steps below describe how to configure a sensitivity label that defines permissions when creating the label in the Purview console, which are enforced on content upon label application (i.e., admin-defined permissions):
1. Navigate to Information Protection > Sensitivity labels in the Purview portal (https://purview.microsoft.com/informationprotection/informationprotectionlabels/sensitivitylabels).
2. Click on + Create a label.
3. On the Choose protection settings for the types of items you selected page, ensure to select Control access.

4. On the Access control page, configure the following:
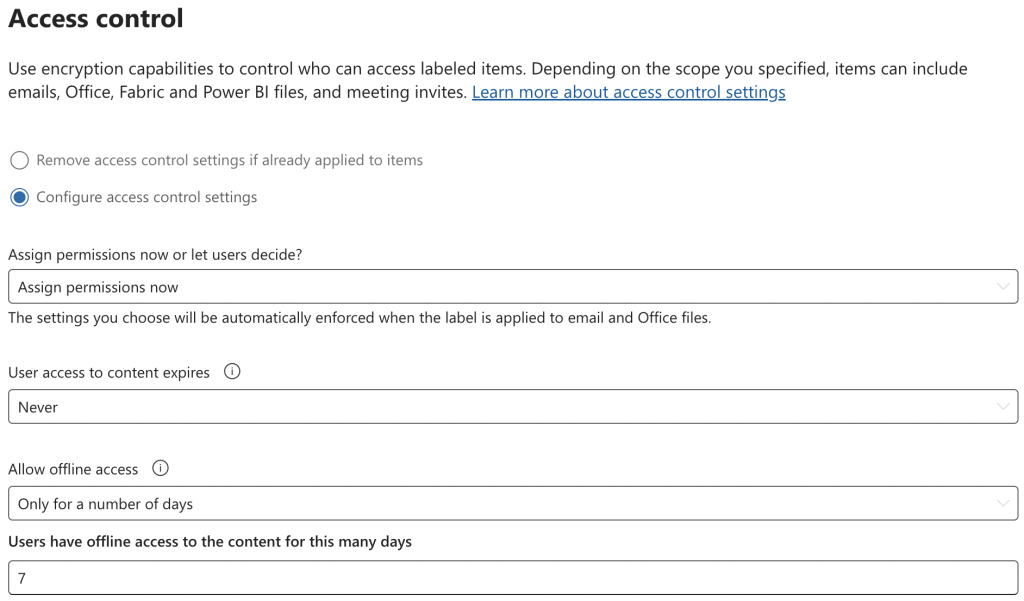
- Under Assign permissions now or let users decide?, select Assign permissions now.
- Under User access to content expires, select either Never, On a specific date, or A number of days after label is applied. Selecting “On a specific date” or “A number of days after label is applied” here can be useful for proactively managing content access. However, these options should be used prudently to avoid disrupting user productivity.
- Under Allow offline access, select either Always, Never, or Only for a number of days. Selecting “Only for a number of days” or “Always” here can be useful for enabling users that are traveling and will temporarily not have access to the internet, for example, to access content.
- Under Assign permissions to specific users and groups, click on Assign permissions. There are quite a few options available to specify the permissions and who they are assigned to that are highly dependent on the intended sensitivity label usage. Please see below for the available configurations:
- Scope: Add all users and groups in your organization, add any authenticated users, add specific users or groups, and add specific email addresses or domains.
- Permissions: Choose from built-in permissions (e.g., Co-Author) or configure custom permissions by selecting specific usage rights. Please refer to the following Usage Rights Descriptions by Microsoft to learn more about the available usage rights.

Configuring Visual Markings
The steps below describe how to configure visual markings such as headers, footers, and watermarks in the Purview console:
1. Navigate to Information Protection > Sensitivity labels in the Purview portal (https://purview.microsoft.com/informationprotection/informationprotectionlabels/sensitivitylabels).
2. Click on + Create a label.
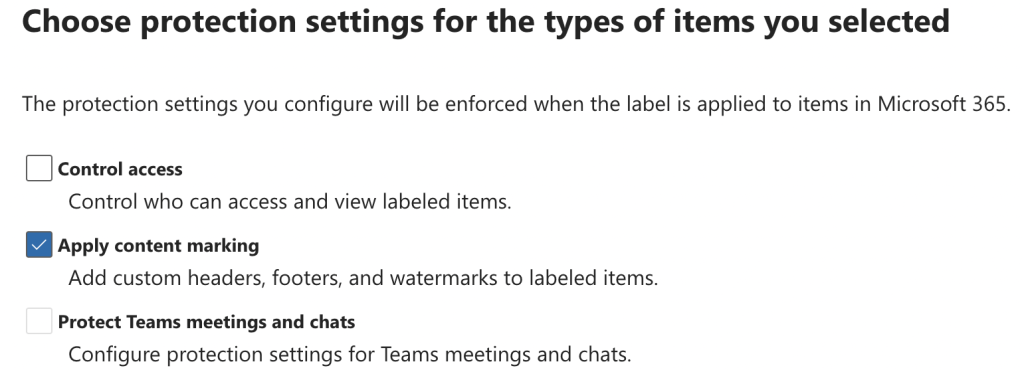
3. On the Choose protection settings for the types of items you selected page, ensure to select Apply content marking.
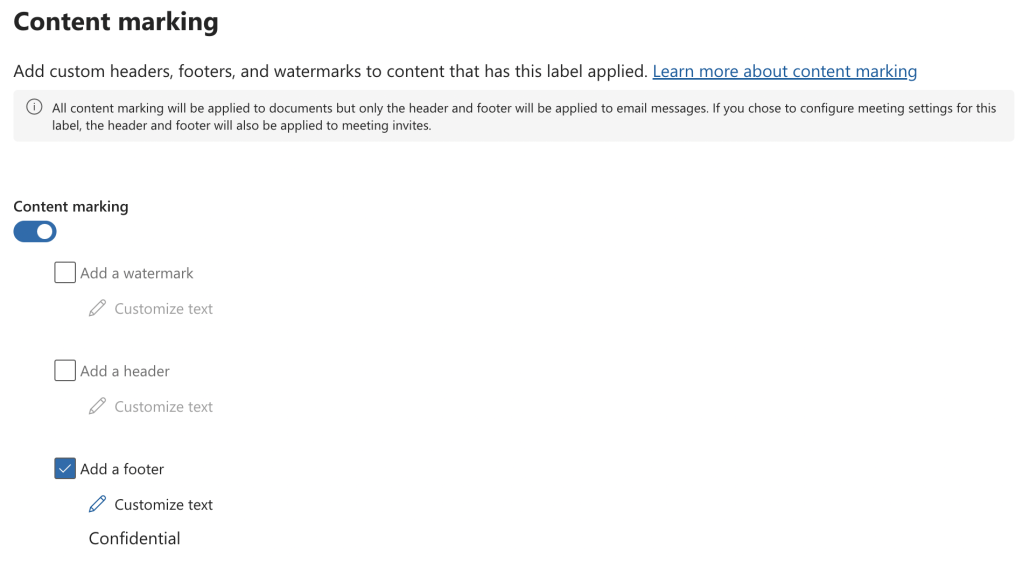
4. On the Content marking page, configure the following:
- Select the checkbox next to Add a watermark, Add a header, and/or Add a footer, depending on where it is most appropriate to apply the visual marking. If your organization frequently uses certain document templates with defined headers, footers, or even watermarks, it is very important to consider how the marking will interact with the existing templates before deploying the sensitivity label.
- After selecting the desired checkboxes, select Customize text to assign the Footer text, font size, font colour, and text alignment. Although configuring font colour can be a useful visual indication of a higher sensitivity level and draw attention to the marking (e.g., a footer in red), please do consider accessibility when configuring this option.
Closing Thoughts
Configuring encryption and visual markings in Purview sensitivity labels helps to more effectively protect your organization’s data. As you’ve seen above, it is quick for administrators to configure these features. However, it is very important to deploy these features in iterations that allow for sufficient testing and validation of effectiveness and alignment across the organization to support a successful user adoption.
Stay tuned for my next blog that will provide an overview of applying sensitivity labels in Microsoft 365 to secure your organization’s cloud data assets.
