
Microsoft Features: Microsoft Purview Adaptive Protection, Microsoft Purview Insider Risk Management, Microsoft Purview Data Lifecycle Management
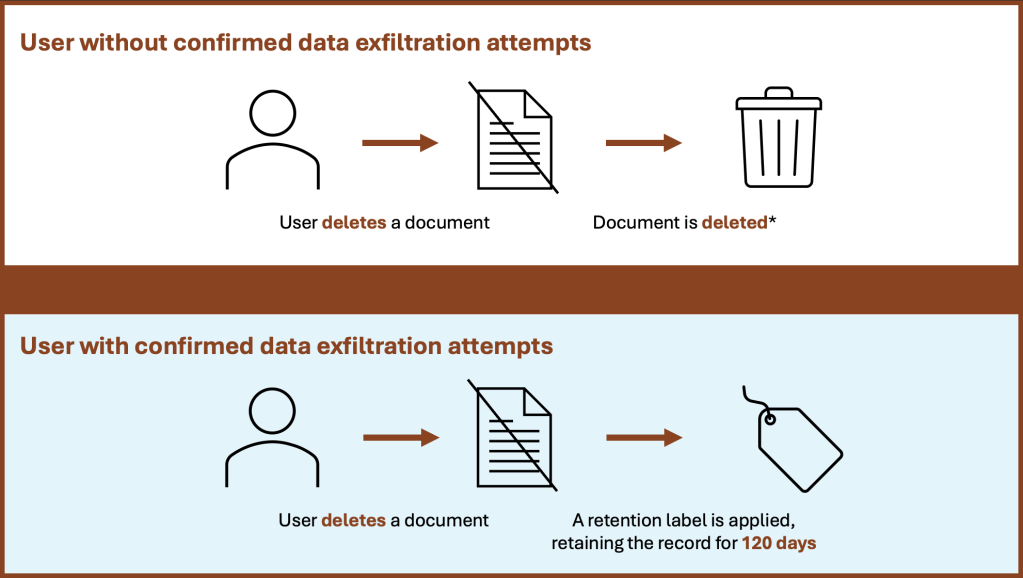
In a previous blog post, I wrote about Microsoft Purview Adaptive Protection and how it can help organizations balance security and productivity. One of the real-world examples of Adaptive Protection that I wrote about had to do with automatically retaining data deleted by a risky user for 120 days, while allowing the same data deletion for non-risky users (as shown below). If you haven’t yet had a chance to read that blog, head over here to catch up.
In this blog, we’ll step through how to configure the above use case from start to finish, including the following steps:
- Step 0: Configure Adaptive Protection Prerequisites
- Step 1: Configure an Insider Risk Management Policy
- Step 2: Ensure Adaptive Protection is Turned On
- Step 3: Configure Insider Risk Levels Settings in Adaptive Protection
- Step 4: Configure Adaptive Protection for Data Lifecycle Management
Please note, that as Adaptive Protection for Data Lifecycle Management is in Public Preview at time of writing, the features and configuration steps detailed below are subject to change.
Step 0: Configure Adaptive Protection Prerequisites
Before we get started, there are a number of prerequisites to pay attention to:
- Ensure that you have sufficient licensing (e.g., Microsoft 365 E5). For more information on licensing requirements for Insider Risk Management, Data Lifecycle Management, and Adaptive Protection, refer to this licensing guide published by Microsoft.
- Configure your tenant for Microsoft Purview Insider Risk Management (IRM). This includes:
- Assigning permissions for IRM (required)
- Enabling the Microsoft 365 audit log (required)
- Enabling IRM analytics (recommended)
- Configuring any necessary prerequisites for policies (recommended)
- Configuring insider risk settings (required)
Please note, if you have completed the configurations in my Adaptive Protection for Data Loss Prevention blog, you should have the above prerequisites already configured.
Step 1: Configure an Insider Risk Management Policy
Now that the prerequisites are configured, it’s time to create an IRM policy for Adaptive Protection. We’ll be creating an IRM policy using the Data leaks template to identify data exfiltration attempts by users included in the policy.
1. Navigate to Insider Risk Management > Policies in the Purview portal and click on +Create policy (https://purview.microsoft.com/insiderriskmgmt/policiespage).
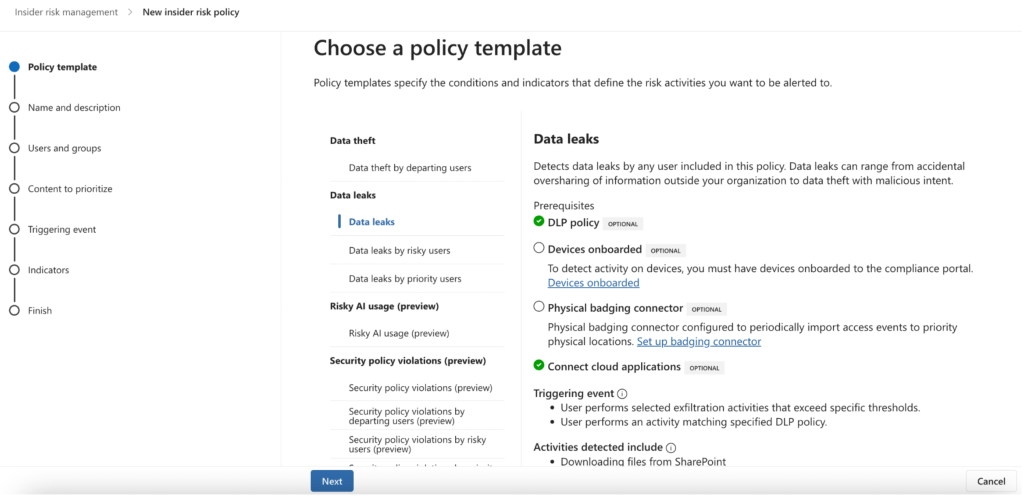
2. On the “Choose a policy template” page, select the Data leaks template.
3. On the “Choose users and groups” page, you can select specific users / groups / adaptive scopes to include in the policy, or deploy to all.
4. Now in preview, you can select users/groups to exclude from the policy, if applicable.
5. On the “Decide whether to prioritize content” page, you can specify content to be prioritized in the policy based on its location, recognized sensitive information types, applied sensitivity labels, and many more. If you do not need to prioritize content, simply click on Next to proceed without configuring.
6. On the “Choose triggering event for this policy” page, you can select to trigger when a user matches a Data Loss Prevention policy or when a user performs an exfiltration activity. For this use case, we will be selecting User performs an exfiltration activity and choosing which exfiltration activities will trigger the policy.

7. On the “Choose thresholds for triggering events” page, you can select built-in thresholds or choose your own to align with your organization’s needs. I will be applying built-in thresholds first, and if needed, customizing the thresholds at a later time.

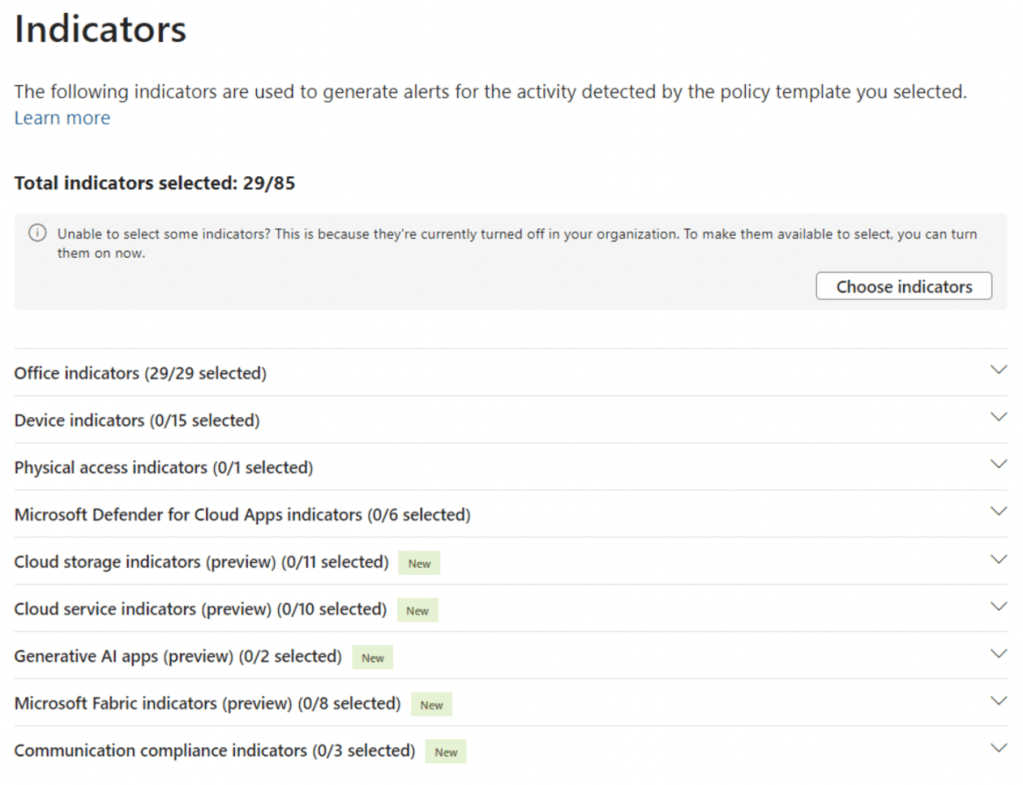
8. On the “Indicators” page, ensure that the Office indicators are selected. This will ensure that alerts are generated based on exfiltration activities in Microsoft 365, such as downloading a file from SharePoint and emailing it as an attachment to an external user.
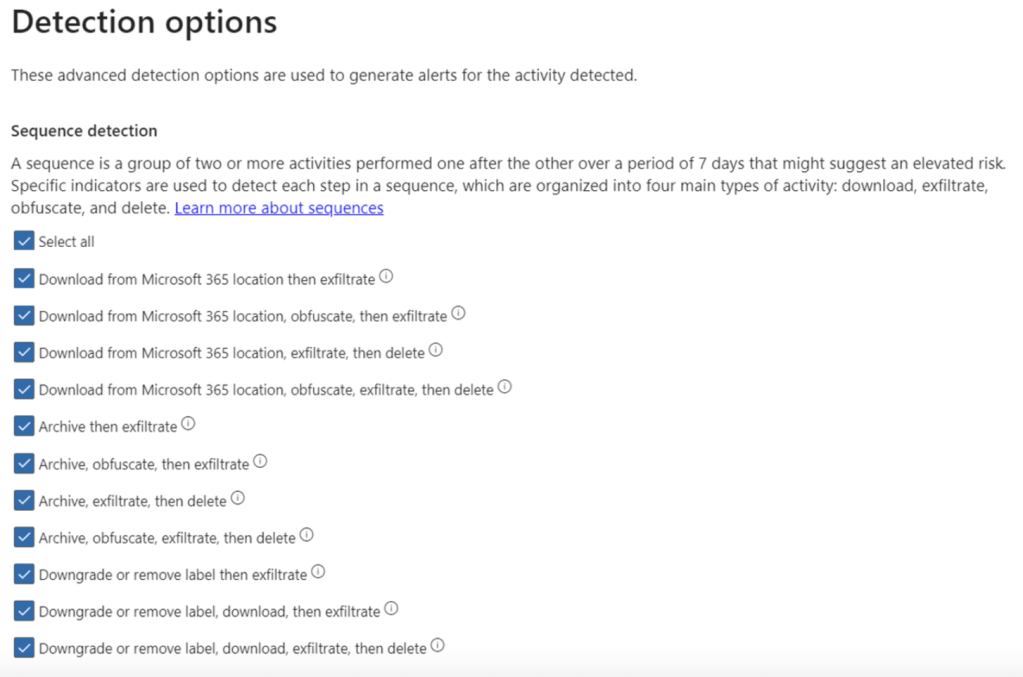
9. On the “Detection options” page, select all exfiltration sequences that are of interest to your organization.
10. On the “Choose threshold type for indicators” page, you can specify the number of activities for each indicator that will result in a low, medium, and high severity alert. There is the option to choose your own thresholds, apply thresholds based on user activity analytics, and apply thresholds provided by Microsoft.
11. Finally, review the policy settings and click on Submit to create the policy.
Step 2: Ensure Adaptive Protection is Turned On
If Adaptive Protection has not yet been turned on in your tenant, head over to Insider Risk Management > Adaptive Protection > Adaptive Protection settings in the Purview portal and switch the radio button to On under “Adaptive Protection”.
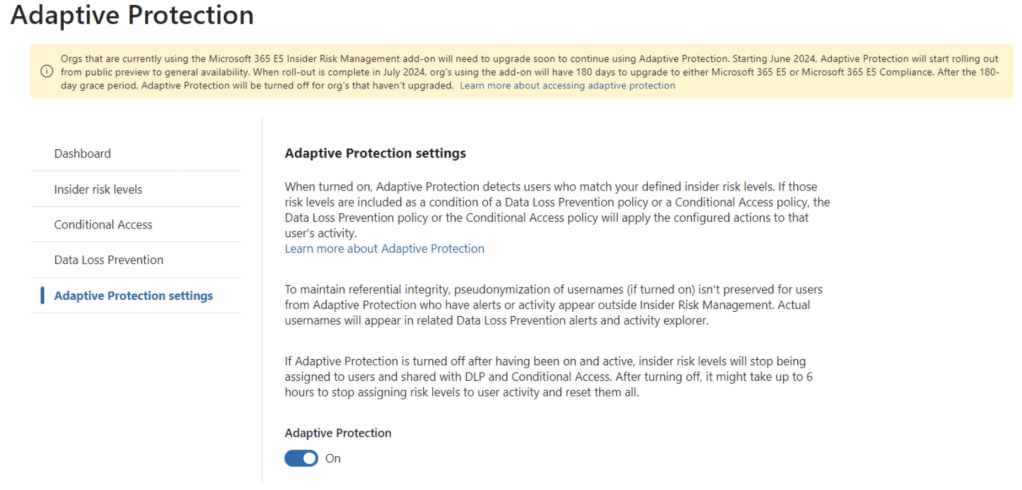
Please note, if you have completed the configurations in my Adaptive Protection for Data Loss Prevention blog, you should already have Adaptive Protection turned on.
Step 3: Configure Insider Risk Levels Settings in Adaptive Protection
Now that we have created the IRM policy, it’s time to define Insider Risk Levels settings for Adaptive Protection.
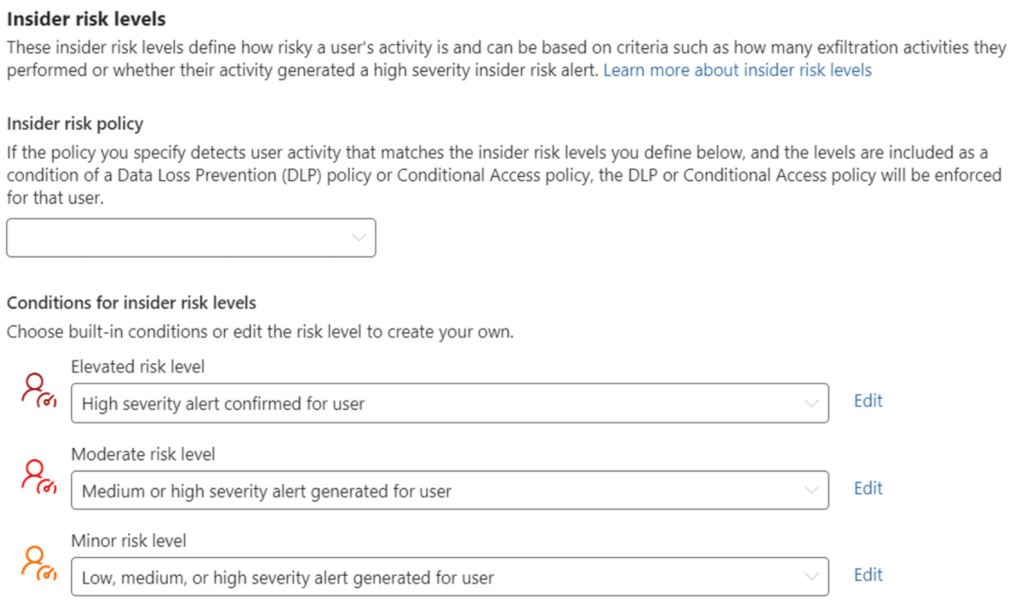
1. Navigate to Insider Risk Management > Adaptive Protection > Insider risk levels in the Purview portal.
2. Under “Insider risk policy”, select the IRM policy we created in Step 1.
3. Under “Conditions for insider risk levels”, select the following.
- Elevated risk level: High severity alert confirmed for user
- Moderate risk level: Medium or high severity alert generated for user
- Minor risk level: Low, medium, or high severity alert generated for user
4. Past activity detection can be configured to define how many days of previous user activity is considered.
5. Insider risk level time frame can be configured to define how long a user risk level is assigned before it’s reset.
6. Insider risk level expiration can be configured to expire a user’s risk level if the alert is dismissed or the case is closed.

Please note, if you have completed the configurations in my Adaptive Protection for Data Loss Prevention blog, you should already have configured the above Insider Risk Levels settings (in this case, double check that the newly configured IRM policy is selected under “Insider risk policy”).
Step 4: Configure Adaptive Protection for Data Lifecycle Management
Now that we have configured insider risk levels settings, it’s time to configure Adaptive Protection for Data Lifecycle Management.
1. Navigate to Settings > Data Lifecycle Management > Adaptive protection in the Purview portal (https://purview.microsoft.com/settings/application-settings/datalifecyclemanagement).
2. Ensure that “Adaptive protection in Data Lifecycle Management” is set to On.
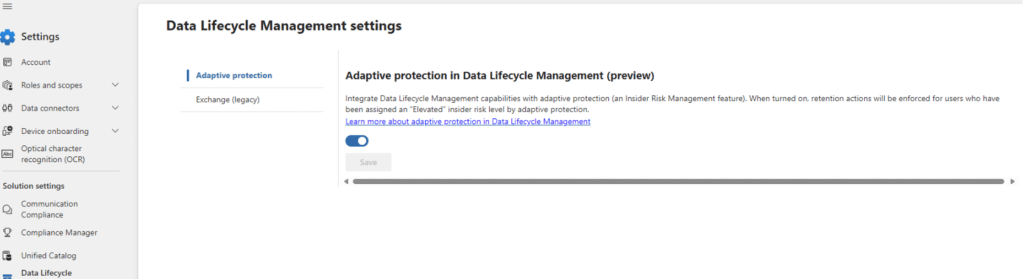
In the backend, turning adaptive protection in data lifecycle management on creates an auto-labeling policy that automatically applies a retention label that enforces a retention period of 120 days to all documents deleted by users assigned an “Elevated” risk level by adaptive protection.
Closing Thoughts
After completing the above configurations, files deleted by elevated risk users (i.e., users with confirmed past data exfiltration attempts of high risk) will be automatically retained for 120 days. This protects your organization’s data from malicious destruction and provides administrators a way to retrieve deleted data if needed.
Watch out for my upcoming post on how to configure Adaptive Protection for Microsoft Entra Conditional Access to dynamically protect sensitive apps!
