
Microsoft Features: Microsoft Purview Adaptive Protection, Microsoft Purview Insider Risk Management, Microsoft Purview Data Loss Prevention
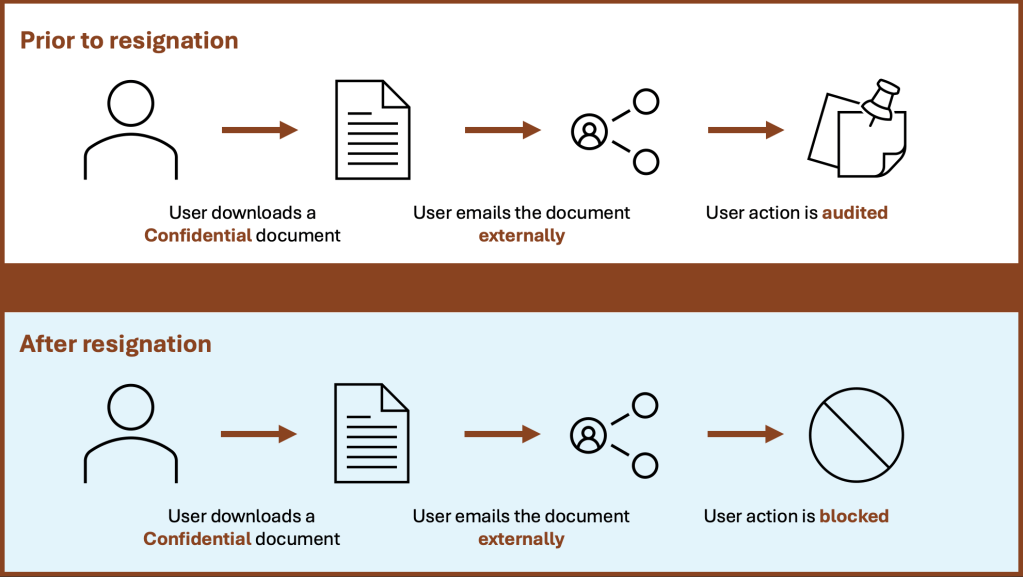
In a previous blog post, I wrote about Microsoft Purview Adaptive Protection and how it can help organizations balance security and productivity. One of the real-world examples of Adaptive Protection that I wrote about had to do with blocking a departing user from emailing a Confidential document externally, while allowing the same data flow prior to the user’s resignation (as shown below). If you haven’t yet had a chance to read that blog, head over here to catch up.
In this blog, we’ll step through how to configure the above use case from start to finish, including the following steps:
- Step 0: Configure Adaptive Protection Prerequisites
- Step 1: Configure an Insider Risk Management Policy
- Step 2: Turn on Adaptive Protection
- Step 3: Configure Insider Risk Levels Settings in Adaptive Protection
- Step 4: Adaptive DLP Policy Configuration
Step 0: Configure Adaptive Protection Prerequisites
Before we get started, there are a number of prerequisites to pay attention to:
- Ensure that you have sufficient licensing (e.g., Microsoft 365 E5). For more information on licensing requirements for Insider Risk Management, Data Loss Prevention, and Adaptive Protection, refer to this licensing guide published by Microsoft.
- Configure your tenant for Microsoft Purview Insider Risk Management (IRM). This includes:
- Assigning permissions for IRM (required)
- Enabling the Microsoft 365 audit log (required)
- Enabling IRM analytics (recommended)
- Configuring any necessary prerequisites for policies (required)
- Configuring insider risk settings (required)
- Set up a connector to import HR data.
Please note that in this case, configuring the HR connector is highly recommended because we are adapting protection based on a user’s resignation.
Step 1: Configure an Insider Risk Management Policy
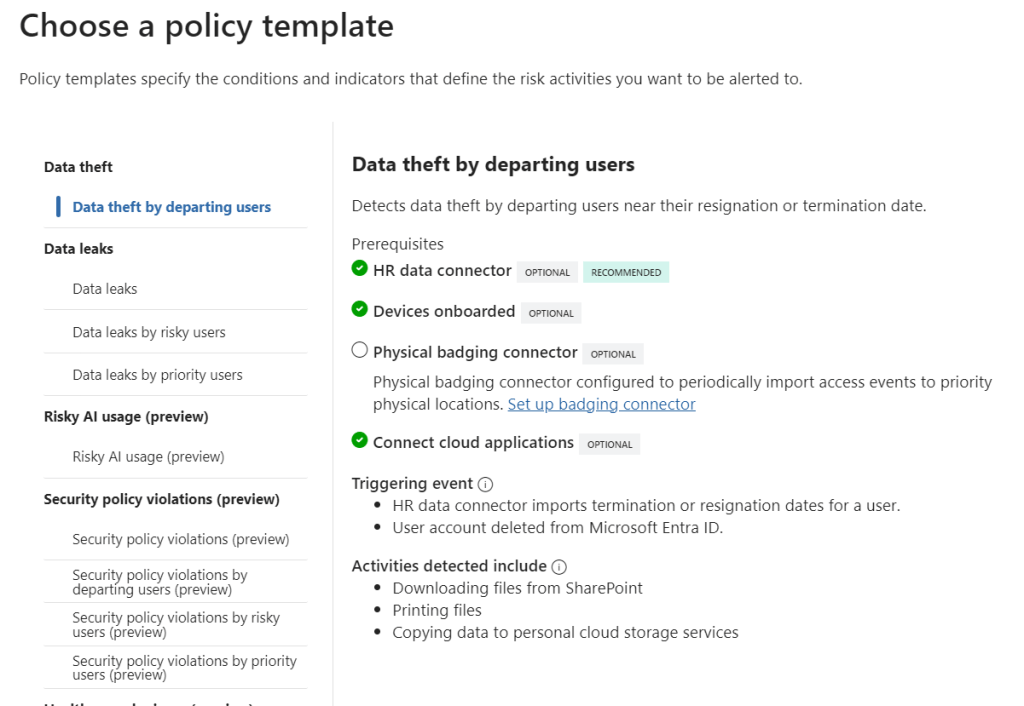
Now that the prerequisites are configured, it’s time to create an IRM policy for Adaptive Protection. We’ll be creating an IRM policy using the Data theft by departing users template to align with our use case.
1. Navigate to Insider Risk Management > Policies in the Purview portal and click on +Create policy (https://purview.microsoft.com/insiderriskmgmt/policiespage).
2. On the “Choose a policy template” page, select the Data theft by departing users template.
3. On the “Choose users and groups” page, you can select specific users / groups / adaptive scopes to include in the policy, or deploy to all.
4. Now in preview, you can select users/groups to exclude from the policy, if applicable.
5. On the “Decide whether to prioritize content” page, you can specify content to be prioritized in the policy based on its location, recognized sensitive information types, applied sensitivity labels, and many more. If you do not need to prioritize content, simply click on Next to proceed without configuring.
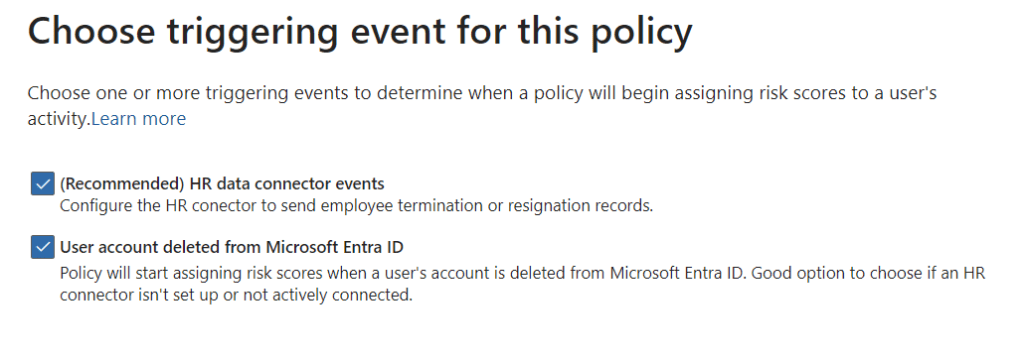
6. On the “Choose triggering event for this policy” page, select the HR data connector events checkbox. This will ensure that the IRM policy will begin assigning risk scores to a user if they are terminated or resign. Likewise, the User account deleted from Microsoft Entra ID trigger can be selected if an HR connector isn’t configured / connected.
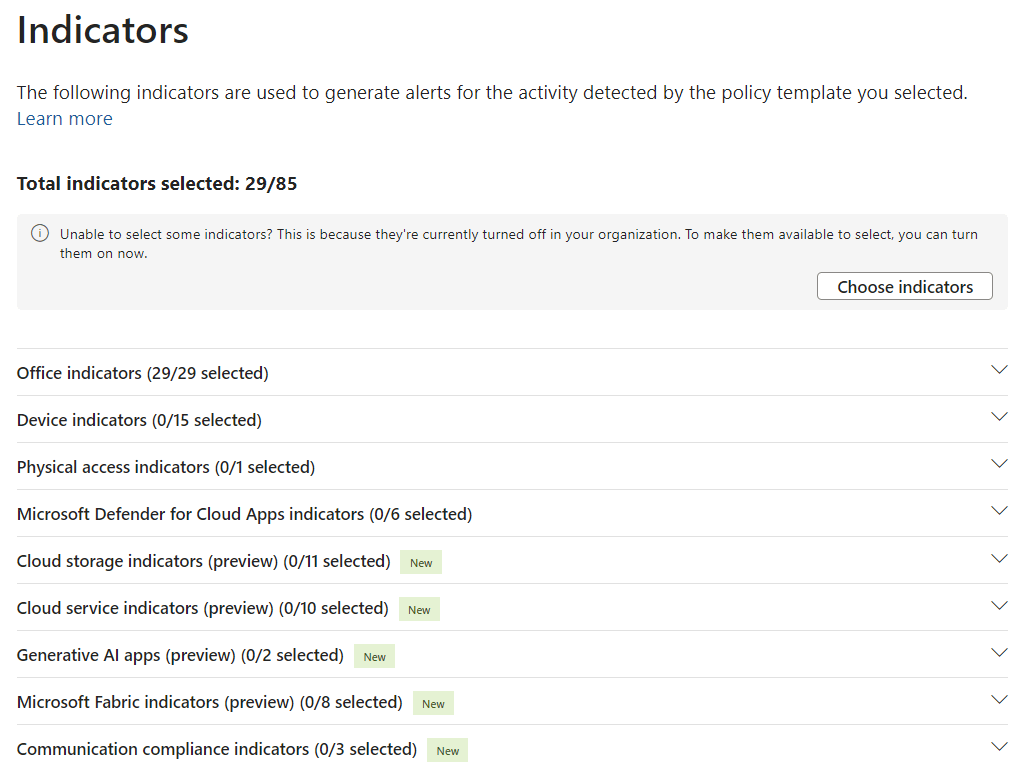
7. On the “Indicators” page, ensure that the Office indicators are selected. This will ensure that alerts are generated based on user activities in Microsoft 365, such as downloading a file from SharePoint and emailing it as an attachment to an external user.
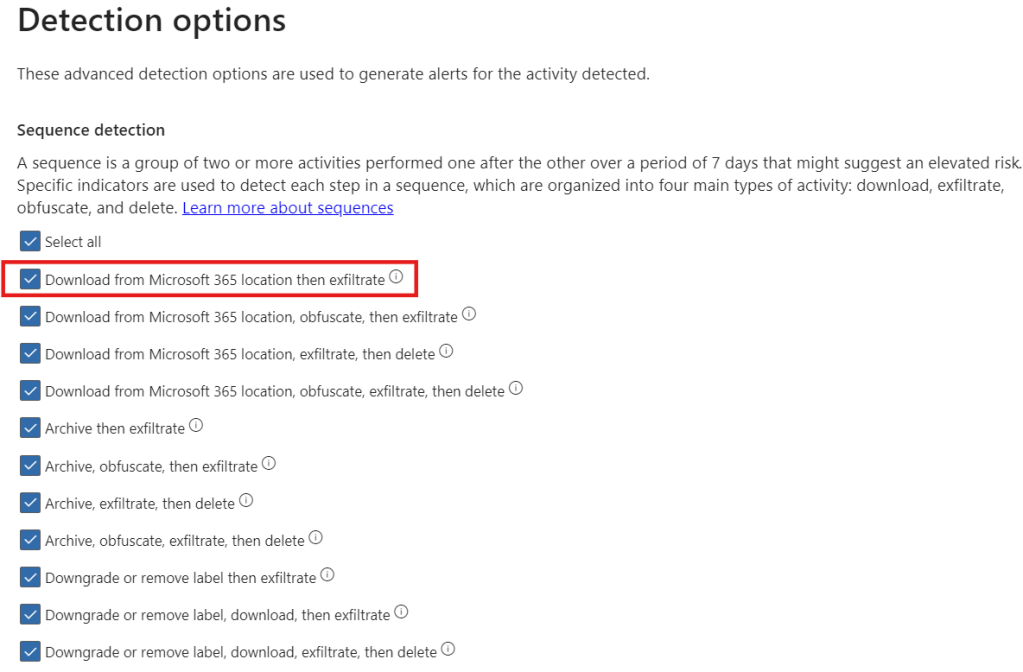
8. On the “Detection options” page, ensure that the Download from Microsoft 365 location then exfiltrate sequence is selected. Additionally, select any other sequences that may be of interest.
9. On the “Choose threshold type for indicators” page, you can specify the number of activities for each indicator that will result in a low, medium, and high severity alert. There is the option to choose your own thresholds, apply thresholds based on user activity analytics, and apply thresholds provided by Microsoft.
10. Finally, review the policy settings and click on Submit to create the policy.
Step 2: Turn on Adaptive Protection
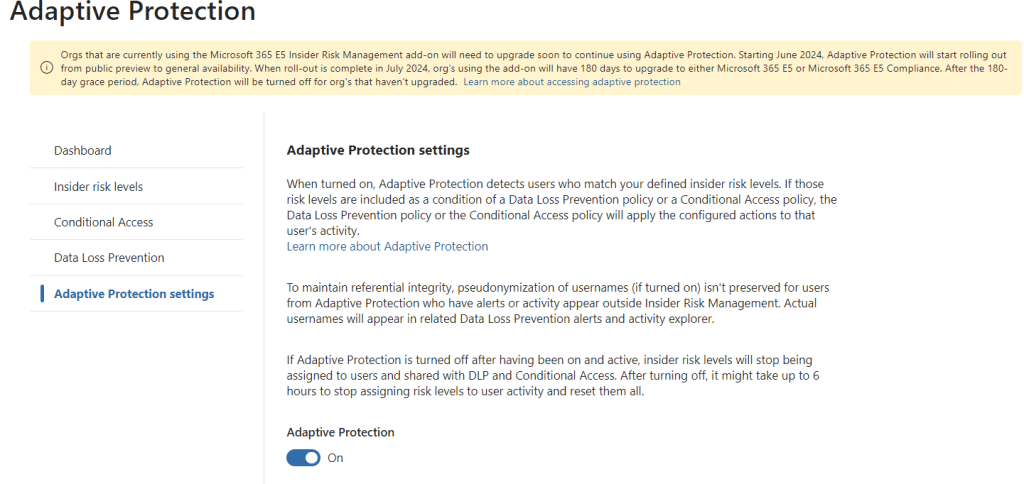
If Adaptive Protection has not yet been turned on in your tenant, head over to Insider Risk Management > Adaptive Protection > Adaptive Protection settings in the Purview portal and switch the radio button to On under “Adaptive Protection”.
Step 3: Configure Insider Risk Levels Settings in Adaptive Protection
Now that we have created the IRM policy, it’s time to define Insider Risk Levels settings for Adaptive Protection.
1. Navigate to Insider Risk Management > Adaptive Protection > Insider risk levels in the Purview portal.
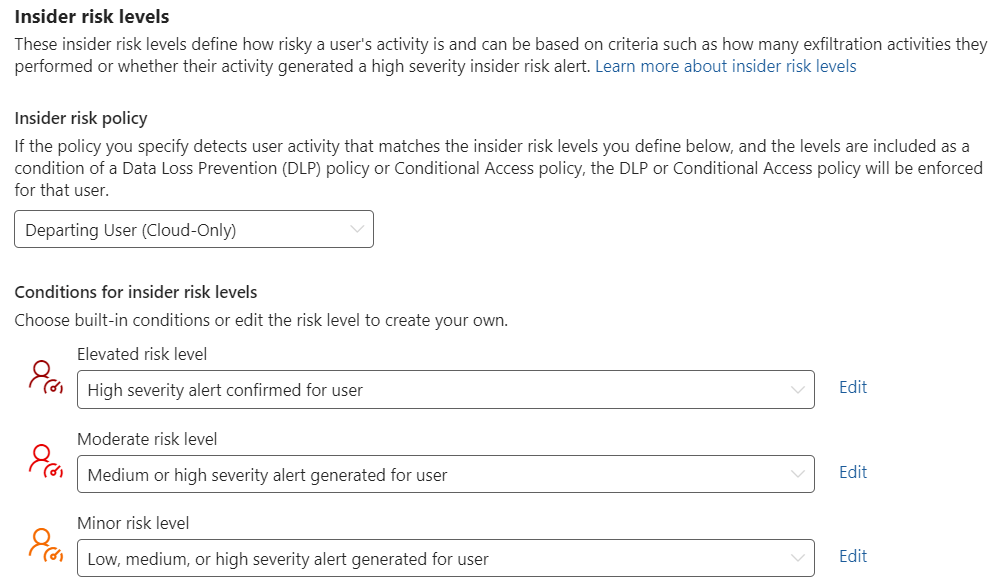
2. Under “Insider risk policy”, select the IRM policy.
3. Under “Conditions for insider risk levels”, select the following:
- Elevated risk level: High severity alert confirmed for user
- Moderate risk level: Medium or high severity alert generated for user
- Minor risk level: Low, medium, or high severity alert generated for user
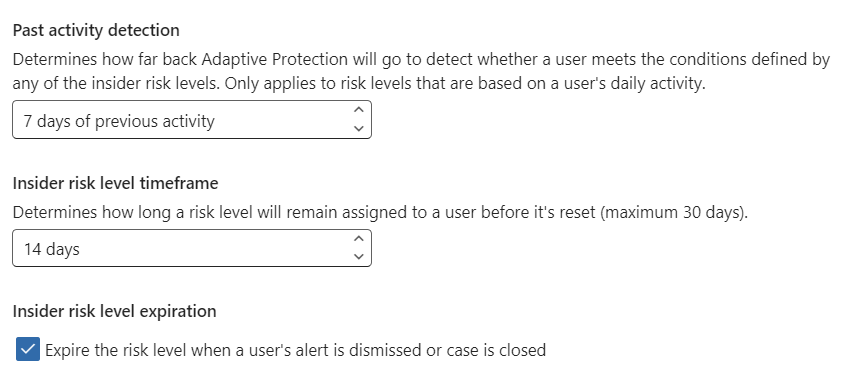
4. Past activity detection can be configured to define how many days of previous user activity is considered.
5. Insider risk level time frame can be configured to define how long a user risk level is assigned before it’s reset.
6. Insider risk level expiration can be configured to expire a user’s risk level if the alert is dismissed or the case is closed.
Step 4: Adaptive DLP Policy Configuration
To conclude the configuration, we will be implementing a DLP policy using the “Insider risk level for Adaptive Protection is” to dynamically block / audit an email with a Confidential document attached and sent externally depending on the user’s risk level.
1. Navigate to Data Loss Prevention > Policies in the Purview portal and click on +Create policy (https://purview.microsoft.com/datalossprevention/policies).
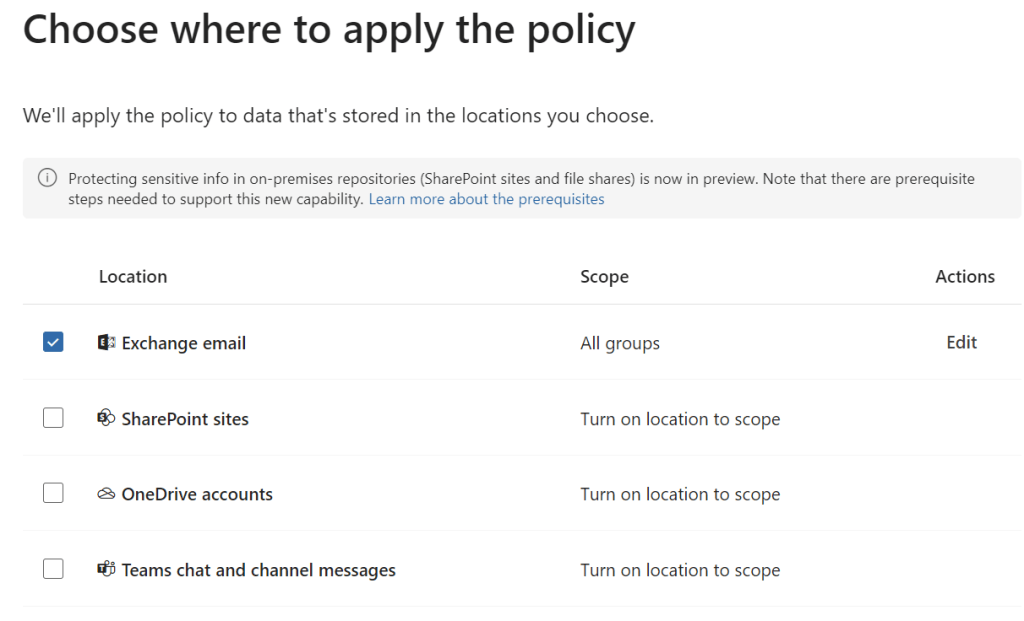
2. On the “Choose where to apply to policy” page, select the Exchange email location.
Note: this is scoped to all groups by default
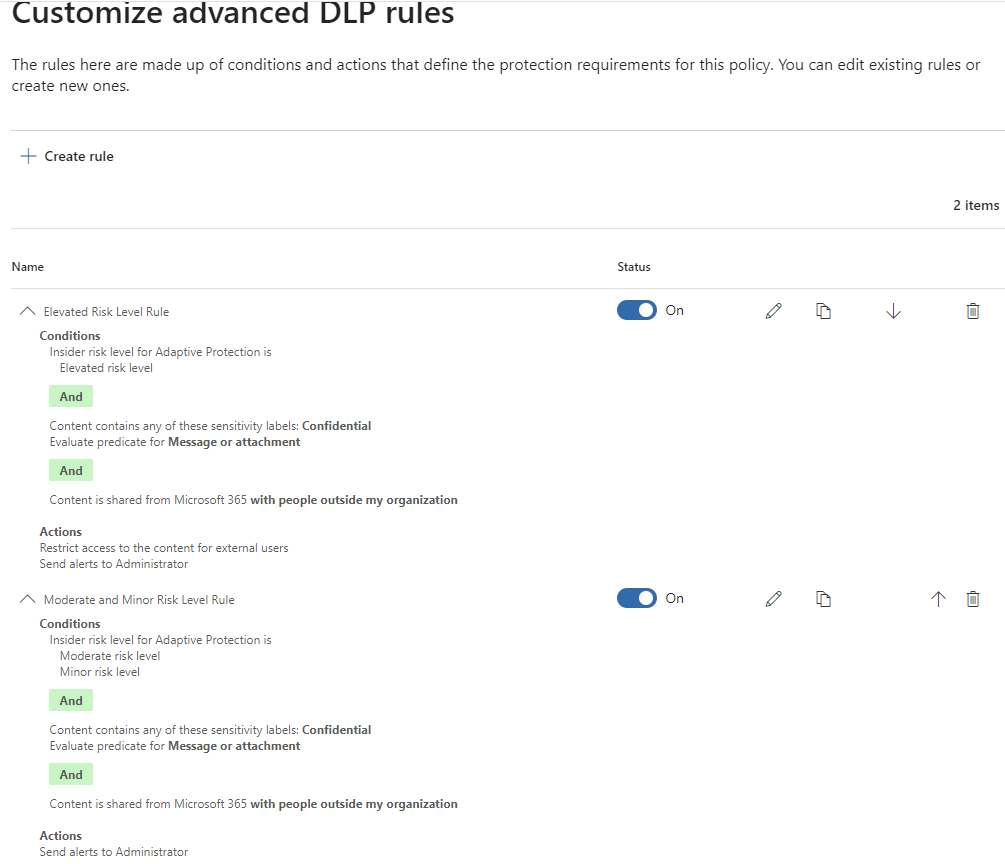
3. On the “Customize advanced DLP rules” page, define the following rules:
| Settings | Rule 1 (Elevated Risk) | Rule 2 (Moderate & Minor Risk) |
| Conditions | Insider risk level for Adaptive Protection is: Elevated risk level AND Content is shared from Microsoft 365: With people outside my organization AND Content contains: Sensitivity labels > Confidential | Insider risk level for Adaptive Protection is: Moderate risk level Minor risk level AND Content is shared from Microsoft 365: With people outside my organization AND Content contains: Sensitivity labels > Confidential |
| Actions | Restrict access or encrypt the content in Microsoft 365 locations: Block only people outside your organization | None |
| User notifications | Off | Off |
| User overrides | Off | Off |
| Incident reports | On, Send alert every time an activity matches the rule | On, Send alert every time an activity matches the rule |
| Additional Options | Off | Off |
4. Choose a policy mode, review, and click on Submit to create the policy.
Closing Thoughts
And there you have it! You’ve successfully deployed an adaptive DLP policy that will block a departing user with a confirmed high severity alert from exfiltrating data. Keep in mind that, although we stepped through the configurations for a very specific use case in this blog, there are countless numbers of information flows you can dynamically protect using Adaptive Protection for DLP.
Watch out for future posts on how to configure Adaptive Protection for Microsoft Entra Conditional Access as well as Microsoft Purview Data Lifecycle Management to dynamically protect sensitive apps and automatically retain deleted data for risky users.
